Pages

Wednesday, July 6, 2011

Homeschool Day 1

So on Monday, I FINALLY got the long-awaited A-OK from the hubby to homeschool the kids!  I have always had structured activities for them and a "school time" during the day, but now I can make it official!  So I'm going to try to blog my progress at least until I figure out what works.  This will be sort of my homeschool journal as, through trial and error, I find a system that works for us!

Soooooo....here's most of today!


First we did our weather and calendar at the Classroom Closet.  Then we reviewed our sight words from last week's 4th of July unit.  We reviewed the parts and colours of the United States Flag then worked on a Melissa and Doug USA floor puzzle.  (I totally forgot to say the Pledge of Allegience and say a prayer during our beginning activities!)  This is a good puzzle for us because my 3/yo can sort the puzzle pieces by colour, and my 4/yo can put the puzzle together. 


While Nikolas was working on the floor puzzle, Ava Louise and I worked on shapes, colours, and sorting with another puzzle that I found in the Dollar Spot at Target 2 summers ago.

Then we met back around the Classroom Closet to sing "Happy Birthday America" which we learned last week and watched the video.  Next, we listened to--and talked about--the Alabama state song, "Alabama".

Next we did our Poetry Basket.  I got the idea for a Poetry Basket here at Counting Coconuts, a WONDERFUL blog about homeschooling little ones!  Here's a peek in our Poetry Basket and list of its contents:  "Daybreak in Alabama" by Langston Hughes, an instrument for each child, spray bottle set to "mist", a few toy trees (out of our Dino bucket), 2 sprigs of pine branch, hands traced onto coloured paper.


 I put together a data sheet with miscellaneous clip art pieces that I found throughout the web (much of it here).  It included the state seal, the state flag, the state bird, the state flower, pictures of Alabama's Native Americans and their tools and pottery, native wildlife, local agriculture, and art by Alabama-born Howard Finster

The kids practiced coloring, gluing, scissor skills and collaging (just made that one up, but I think I like it!) by creating a state seal, state flag, state bird and state flower, doing their best to copy the pictures provided.  Finally, they made a collage on the state of Alabama using cotton balls, popcorn, and peanuts to represent the local agriculture.  Each of their created images was then glued to the first page of their 50 Nifty States self-authored book.

Here are the pictures of these activities:
 I put the laptop on a chair by their table so they could see the pictures.


 Practice with scissors!  Cutting out a circle...Nikolas is already proficient at this, but a little practice never hurt, and Ava Louise is still quite a ways from being able to do this herself.

 State agriculture collage....I know I know, it's upside down!


 Here's a sideways pic of our peanut and popcorn snack in keeping with our theme.

 Then the kids took turns on the computer doing an interactive coloring page of the 
Alabama state bird at this site.
 They each did a lacing activity while they waited their turn on the computer.


More sideways pictures...here are the first pages of their 50 Nifty State Books.  
The flags were made by gluing red crepe paper to a blank coloring sheet.

All the blank sheets were found here.

All in all it was a good first day and ran smoothly.  I need to get started a little earlier, and I need to have some activities that we do for circle time before we start our new lessons.  I'm currently working on a variation of the work box system that I think will work for us.  More on that later!

Signing off!
~Melissa  :0)

Saturday, July 2, 2011

Red White and Blue Edible Treats

I'm a little late with this one for those of you who have already figured out how to turn your entire 4th of July menu into a smorgasbord of Old Glory's famous hues, but here it is, nonetheless...how about serving your watermelon disguised as a tiered cake?  Layer shredded coconut, raspberries, and blueberries between each layer, and "ahhhhhhhhhh" (that was angels singing...beautiful, I know!), you've got a super easy, super cute, super WOW way of serving up those sacred colours!

Wednesday, June 29, 2011

Project "Read More"

I am employing several sneaky little tactics in an effort to promote healthy reading habits in our home, one of them being to create a couple of fun little reading nooks for the kiddos!  Today I FINALLY got around to working on (and, SHOCK, actually finishing) this first one...it's in our playroom, and the kids L-O-V-E it!  I still need to add a light, and this weekend we're installing rain gutter bookshelves like these and these.  I can hardly wait!  This is the PERFECT solution to adding bookshelves (ideally allowing books to be forward-facing) without taking up any of the shrinking floor space in our family/play room!  Okay....here's the new Book Nook!  Enjoy!

So, there is a 36 inch space on either side of our entertainment center between it and the wall.  
This little corner used to be a cluttered heap of toys, 
but I had a vision that it would someday be a fun, inviting, whimsical little nook 
just begging for a little pre-schooler to curl up in with a good book.


I have a 4-y-o boy and a 3-y-o girl, so I needed something gender neutral, 
so I was super excited when I found this smokey blue fabric with 
multi-colored circles...some pink--her favorite, and some orange--his favorite!


My little bookworms!


Pennant details...love this scallop stitch on my sewing machine, and I love the extra little pops of color achieved by adding the ribbons in between each pennant.


I'd love to hear how you promote good reading habits in your homes!

The Important Things...:0)

So my house is a DISASTER zone, BUT I made this adorable 4th of July wreath!  Priorities right?

I hope you all are having fun red, white, and blue-ing your houses!  I sure am!

Sunday, June 26, 2011

Dinner Dip

One of the perks of being a stockpile shopper is, of course, spending very little--sometimes even nothing at all, and sometimes even making money--when shopping.  Another perk is being able to shop from my own stockpile, rarely having to run to the store for missing ingredients halfway through cooking a meal.  I usually post pictures of my loot when I get home from a shopping trip, and the pictures usually contain a few food items, a few toiletries, and a few household cleaners and such.  When I post pictures of 6 bottles of Windex, 4 bags of shredded cheese, 8 cans of diced tomatoes, 3 rolls of biscuits, and 2 bottles of lotion (or something of sort), I am often asked, "but what will you eat?".  Yes, I can see why this is a recurring question...Windex and cheese for dinner anyone?

So, I thought I'd post a few of our favorite and most economical meals that were made from my own stockpile of ingredients.  They are NOT fancy, but they ARE tasty, and they are CHEAP!!!!

Tonight, we had Dinner Dip...my own concoction of ever-changing ingredients served with corn chips for a dip-tastic supper.

For tonight's Dinner Dip, I used: 
2 fairly large chicken breasts (I had already cut one up when I realized I needed to take the picture!)
1 can Ro-Tel
1 tub Philadelphia cooking cream, Santa Fe flavor
1/2 bag Sargento shredded cheese
Tortilla chips

First, I boiled the frozen chicken (save the cooking water for soup on another night!).  Then I just chopped it up:

Then I added the cooking cream and Ro-Tel and stirred it all up.


Then, I topped it with a couple of handfuls of cheese...YUM!


Then I cooked it at 350 until the cheese was melted, and it was warm throughout.


Dip in the chips; top with homemade salsa...and ta da!

Dinner Dip from my own stockpile...I did pay full price for that bag of chips, so this meal cost around $5 and fed my family of 4 (2 of which are preschoolers), and there's enough for hubby's lunch tomorrow or for both of the kids to have it for lunch tomorrow!  I'd say that's a pretty good deal!

Tuesday, May 31, 2011

Contact paper art

Project Big-Girl-Room is underway!

So far, the only thing I've accomplished is to start sanding her headboard and to make 2 of the 3 Contact Paper canvases.  Most of you will wonder why I'm even posting pictures of this project because it seems like such a no-brainer, but every DIY-er has had at least ONE of those "this-will-only-take-me-a-couple-of-hours-and-will-look-better-than-anything-I've-ever-seen-in-a-store" projects that turned into a "2-trips-to-Home Depot-and-6-trips-to-WalMart-later-I've-spent-more-on-this-than-our-entire-kitchen-remodel-and-it-still-looks-more-like-it-was-made-by-a-6-year-old-than-something-that-was-purchased-at-an-upscale-children's-boutique-and-I-should-have-just-bought-the-PotteryBarn-original-in-the-first-place-I-am-never-making-anything-ever-again" project.  SOOOOO in order to prevent THIS little gem of a project from becoming one of THOSE projects for some poor unsuspecting greenhorn, I'm posting a seemingly ridiculous number of pictures to make it absolutely doable for anyone.

What you need:  scissors, a straight edge (a spatula, ruler, wall-paper-smoother-tool-thingy will all work just fine) some pretty Contact paper (got mine at Michael's from the bargain bins for $3/ roll), as many canvases as you want to make (this could even be done on varying pieces of cardboard).

First, open your pretty Contact paper, and unroll it.  Weight the ends (not pictured) and let it sit for a few hours or overnight, so it's not so eager to return to its comfy little roll shape.

Next, position your canvas on the back of the paper to measure how much you need.  Leave at least an inch overhang.  Don't forget to include the depth of the canvas; otherwise, your paper will not wrap around the edges.

Then, starting at the top, peel back a few inches of the backing to expose the sticky side.

Go ahead and stick the top of the canvas to the top of the paper.

Slide the whole thing to the edge of the table.  This makes it SO much easier to get the backing off the paper a little at a time.  Hang the paper that still has the backing on it off the edge of the table.  With one hand, slide the canvas up while holding on to the backing with the other hand.  (sorry about the orientation of this picture...can't change it for some reason...it previews the other way then posts like this???)

Once all the backing is off, and the whole piece of Contact paper is stuck to the front of the canvas, you need to smooth it either with your hand or with a straight edge like a ruler or a wallpaper-smoother-thingy.  First do the middle of the canvas, then the sides, but leave the corners open at this point.
 Smoothing center

Smoothing edges


Open corners

Now you just need to wrap the corners like a present.  Make sure that you do opposite corners in the opposite directions so that both of the top seams are either on the top of the canvas or on the sides and that both of the bottom seams match.


Smooth the corners with your hand, ruler, or wallpaper-smoother-thingy, and VOILA!  Beautiful wall-art!


Thanks for stopping by!  I'd love to see your fun and creative wall-art solutions!  Link up!
~Melissa

Tuesday, May 10, 2011

Classroom Closet....Repurp Project

So over the last few years there has emerged a HOT trend to repurpose objects 
to be used for something other than their intended purpose.  
I've seen some VERY NEAT repurped items, and I LOVE the idea of it!  
I just don't seem to have an eye for this sort of project, though :0(  
I have spent hours perusing Craigslist and dragging my kids to every thrift store I can find, and NOTHING.  Well, almost nothing.  I did find this...

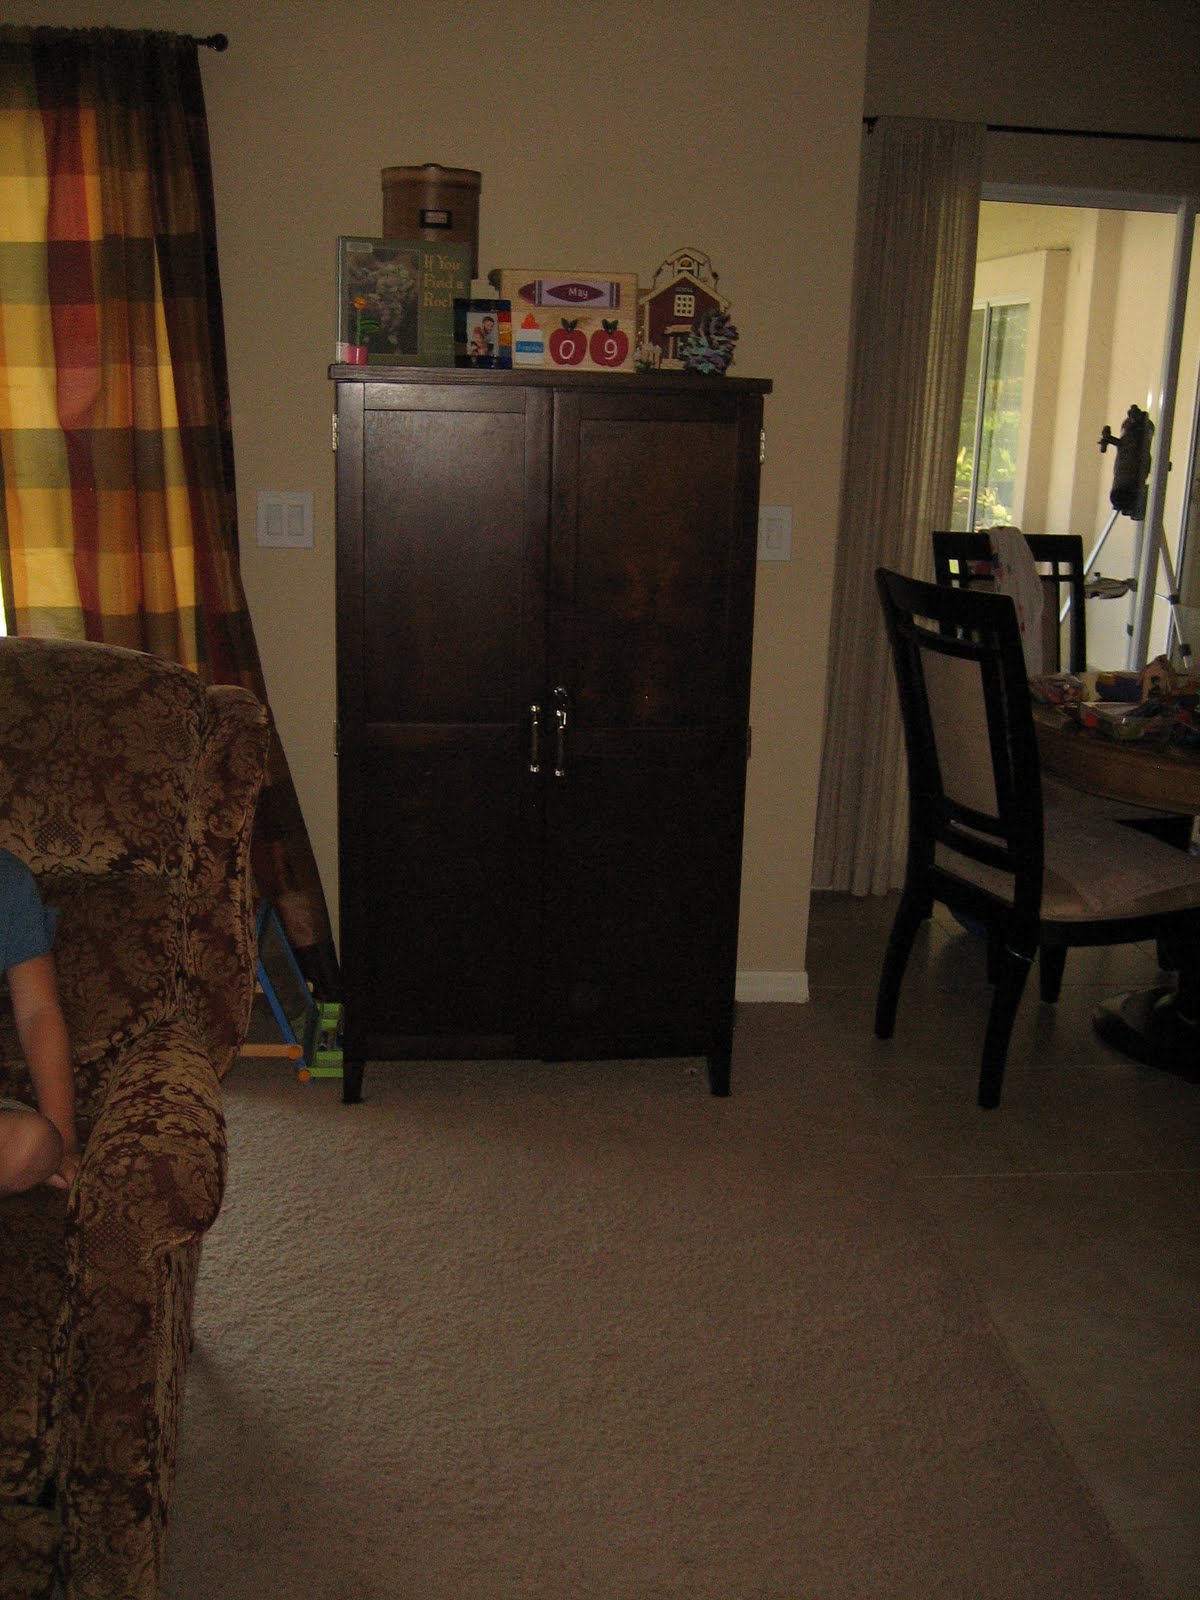
Out in the thrift market, there are SO MANY entertainment armoires that once held bulky tube t.v.s 
and these office armoires meant to house and hide an unsightly desktop computer.

Here's what I found.  It was listed as a "hide-a-desk".  
We have turned it into our Classroom Closet, and we love it!
 I was lucky and found this piece that already had a cork board on one side and a white board on the other, so I didn't have to add these myself. 
We use the top for decorate for the seasons or to display books that have to do with our lessons.


 Inside are our arts and crafts supplies, sensory boxes, some of our educational toys,
workbooks, and other teaching materials.


On the left, we have our weather and sight words of the week.
I always have a theme-of-the-week, and I use corresponding words.


 On the right, I use the white board to teach the lessons.  These pictures are from two weeks ago when we did "April Showers" and learned about the water cycle. This lesson was followed by "May Flowers" and we learned about seeds and how they grow.


 There is room for our classroom closet on this tiny wall between our family room and breakfast room.


 Here it is decked out for Christmas. 
I'm gathering things for a 4th of July theme now for upcoming lessons!

The kids love their classroom closet!  They enjoy being able to access their own arts and crafts supplies, and they love our school time!